Saturday, June 30, 2007

Lindsay's Second Birthday


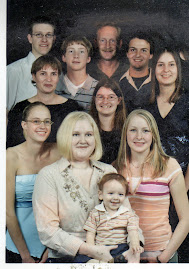
Went to a Stampin Up workshop the other night, and we created this scrapbook layout. When I came home, I decided it was just perfect for some of the photos of Lindsay that have been here forever. (Lindsay is the daughter of our dear friends Debbie and Howie Lee from Chatham, ON). Only problem was, none of us could remember if it was her second or her third birthday...not even her mom! Fortunately, when I looked through another album, I saw one of her with her cake...and it had TWO candles. Lindsay turned 11 this past March....only took me 9 years to do this page!

Friday, June 29, 2007

SCS Sketch Challenge


Here's a card I did for a sketch challenge at Splitcoast Stampers. I used Bliss Blue and Positively Pink for the cardstock and ink colors, and accented it with a scalloped circle from the Cricut (Mini Monograms cartridge). Stamps used are Stampin Up, from the "i love you" set and the "mon ami" set. I designed this for DH ~ just to let him know how much I appreciate him!

Wednesday, June 27, 2007

Loads of Love Birthday

Another Splitcoast challenge ~ I like the way this turned out, even though I normally would never use a color called "Cameo Coral" on a guy card....LOL Our next-door-trailer neighbour, Vince, is always working on his truck. It shines like you wouldn't believe, so it seemed particularly apprpriate to make him a truck card. I used the "Loads of Love" set from Stampin Up for this one, with certainly celery cardstock embossed with my Cuttlebug, a tag cut with my SU circle punch, patterend paper from K and Company, and pastels in Certainly Celery, Chocolate Chip, Going Grey and Cameo Coral to color in the image.

Tuesday, June 26, 2007

Sweet Dreams


What a sweet baby! My first time using chipboard (another splitcoast challenge), and I just love the way this page turned out. Kelton simply DOES NOT sleep...when he was little we tried everything, including the Amby baby hammock pictured here. We were so thrilled when it actually worked and he drifted off. Glad I hurried to take the photos, though, since he only slept for about 20 minutes.


Scrapbook paper is from Studio K, stars are buttons from the dollar store, chipboard from JoAnn's colored with YoYo Yellow craft ink, circle cut with CM circle cutter, words around the circle are from SU's "Fancy Flexible Phrases", and the tags are cut with good old George in the Cricut.

Sunday, June 24, 2007

Happy Birthday, Jade


When I saw a card very similar to this by twingirls on the Splitcoast stamper website, I knew I just had to CASE it to make this one. Our daughter Jade is 22 this year, and I wanted her to be sure she knows how we feel about her. She's currently in her second year of University, and doing it all by online learning. A huge commitment that takes tons a self-discpline, and she is rising to the challenge very well ~ her marks are great!

Friday, June 22, 2007

Tutorial ~ Unmounting Stamps


Wow! My first day blogging and already I have a request for a tutorial. I'm thrilled! I've been asked to show how to unmount stamps for use with an acrylic block. My pleasure.

If you have sets that are currently mounted on wood, the first step is to remove the foam and rubber from the wood block. Most stamps will peel off the block easily, but if the stamp is stubborn, about 5 seconds in the microwave should loosen the glue sufficiently to allow the stamp to come off easily. Be careful when you touch the stamp after microwaving, though; it will be HOT. On very rare occasions, the rubber may separate from the foam ~ if that happens, don't panic! I will tell you how to fix this below.

Once you have removed the stamp from the block, you have a few choices. You can put vinyl cling onto the back of the stamp, or put Tack n Peel onto the block itself. Some people say they have used double sided tape or Aileen's Tack it Over and Over glue as well, although I haven't tried those myself. Vinyl cling (also called Cling Vinyl, or Window Cling, is the most economical alternative, as it can be purchased at most fabric stores.

If you choose vinyl cling, you will often find that the stamp, once removed from the wooden block, is still sticky enough on the back that it will stick to the cling. Simply stick the stamp onto a piece of cling, then cut all the way around. Your stamp can now easily be attached to your acrylic block by pressing it firmly into place. Use and clean as you would any wood-mounted stamp.

With Tack n Peel, you attach it to the block, and the stamp simply sticks in place when you want to use it. If it begins to lose its stick-to-itiveness, gently wash your block in water and allow it to dry. It can be used over and over and over in this fashion.


Have a brand new stamp set that hasn't been mounted yet? Simply trim your stamp as you normally would, remove the paper backing, and you're set to go with any of the methods above.

Did the foam separate from the rubber when you tried to peel it off the block, or did you buy some unmounted stamps that are only rubber with no foam? For these, you will need some E-Z-Mount, which is available online or from any store that sells unmounted stamps. E-Z Mount works exactly like vinyl cling, except that it consists of a layer of foam covered with cling.

The benefits of unmounting? You save TONS of space, since you can store your unmounted stamps in CD cases. The case in this photo contains two full sets of stamps! Also,you can put more than one stamp on your acrylic block at a time (think of spelling out a word with an alphabet set), and you can see exactly where you are stamping without trying to peek under the block.
The photo at left contains over 40 stamp sets in 30 CD cases. The CD holder itself fits easily into my scrapbook tote, making it quick and easy to take my stamps with me when I go to a crop. I was really nervous when I unmounted my first set, but I tried one set for awhile, decided I really unliked it, unmounted all my sets, and never looked back!

Thursday, June 21, 2007

Daddy's Shoes


I did this layout up for a challenge to use creative cropping techniques ~ notice how Kelton is cut out? I tried to make it look like he is walking along the road of life, following Dr. Seuss' quote from the book I read to him every day while I was pregnant with him.
Background paper is from a pack I got from Costco (thanks, Bonnie!), lettering is from the Cricut Teardrop cartridge, tag is cut from George, circle is cut with CM cutter, corner punch is from Stampin Up, stamp is unknown maker, and footprint is Kelton's own .
I love the way this layout came out ~ what do you think?